
“`html
Mastering RAW: The Ultimate Guide to Darktable for Pro-Quality Photos (2025 Edition)
Estimated reading time: 15 minutes
Key Takeaways:
- Darktable is a free and powerful open-source RAW photo editor.
- RAW processing unlocks the full potential of your images.
- Mastering Darktable’s workflow can lead to professional-quality results.
Table of Contents:
- Introduction: Unlocking Pro-Quality Photos with Darktable’s RAW Power
- What is RAW Processing and Why It Matters?
- Darktable: Your Free and Powerful RAW Photo Editor
- Setting Up Darktable for Optimal RAW Processing
- Mastering the Darktable Workflow: A Step-by-Step Guide
- Deep Dive into Essential Darktable Modules
- Filmic RGB: The Key to Modern Tone Mapping
- Color Balance RGB: Precise Color Control
- Tone Equalizer: Targeted Brightness Adjustments
- Local Contrast: Enhancing Fine Details
- Denoise (profiled): Removing Noise Effectively
- Sharpen: Achieving Sharpness Without Artifacts
- Watermark Module: Protect and Brand Your Work
- Advanced Darktable Techniques
- Future Trends: AI and Cloud in Darktable (2025+)
- Troubleshooting Common Darktable Issues
- Darktable Community & Resources
- Darktable Alternatives
- Conclusion: Embracing Darktable for Professional RAW Photo Editing
- For Further Reading
Introduction: Unlocking Pro-Quality Photos with Darktable’s RAW Power
Have you ever wondered how professional photographers achieve such stunning results with their images? A significant part of their secret lies in shooting in RAW format and using powerful software to unlock the full potential of those files. One such software is Darktable, a free and open-source RAW photo editor that rivals even the most expensive paid options. In fact, it is such a good tool that it is mentioned on our main guide for Free Photo Editing Software: The Ultimate Guide. Unlike simpler photo editors, Darktable allows you to manipulate the uncompressed image data from your camera sensor, giving you unparalleled control over the final look of your photos.
While Darktable’s extensive features and module-based workflow can present a steep learning curve, the rewards are well worth the effort. Its non-destructive editing capabilities ensure that your original RAW files remain untouched, allowing you to experiment freely and revert to previous versions at any time. This comprehensive guide will provide you with a deep dive into RAW processing with Darktable, focusing on the latest features and best practices in this 2025 Edition. We will guide you through everything from initial setup and workflow to advanced techniques and future trends. So, whether you’re a seasoned photographer looking to switch to a free alternative or a beginner eager to master RAW processing, this guide is for you.
We’ll begin by understanding what RAW processing is and why it’s so important. Then, we’ll walk through setting up Darktable, mastering its workflow, and exploring its essential modules. Finally, we’ll look at advanced techniques, future trends, and troubleshooting tips to help you get the most out of this incredible software. According to some Expert Opinions on Darktable’s Learning Curve there is quite a learning curve, but with this guide you will be set for success!
What is RAW Processing and Why It Matters?
At its core, a RAW file is an uncompressed, unprocessed data file that comes directly from your camera’s sensor. Think of it as the digital equivalent of a film negative. Unlike JPEGs, which are processed and compressed by your camera, RAW files retain all the original image data, giving you much more flexibility in post-processing. When you compare this to JPEGs, which are compressed and lose data, RAW files offer significantly more detail and dynamic range.
The advantages of RAW processing over JPEG are numerous. RAW files capture a wider dynamic range, meaning they can record more detail in both the highlights and shadows. This allows you to recover details in overexposed or underexposed areas that would be lost in a JPEG. RAW files also offer better color accuracy, allowing you to fine-tune the colors in your images without introducing artifacts. Furthermore, RAW files allow for non-destructive editing. As we discussed earlier in relation to Free Photo Editing Software: The Ultimate Guide, this means that any adjustments you make to a RAW file are stored separately from the original data, preserving the integrity of the original image. You can always revert to the original RAW file if you don’t like the changes you’ve made. This is especially important when dealing with the large file sizes of modern RAW images, as re-editing from scratch would be impractical. Darktable’s history stack, enabled by non-destructive editing, allows for easy experimentation and corrections.
With the rising resolution of cameras, the Importance of Non-Destructive Editing has never been more relevant. Photographers spend considerable time re-editing photos, making non-destructive workflows a huge time-saver. For more in-depth explanation, readers can refer to our detailed guide.
Darktable: Your Free and Powerful RAW Photo Editor
Darktable stands out as a truly remarkable open-source photo editor. As a free and open-source alternative to subscription-based software like Adobe Lightroom, Darktable offers photographers of all levels a powerful and versatile tool for RAW processing. The Growing Interest in Open-Source Photo Editing is hard to ignore.
Darktable’s key features include:
- RAW Processing: Darktable is specifically designed for processing RAW files, giving you complete control over every aspect of your images.
- Non-Destructive Editing: Your original RAW files are always preserved, allowing you to experiment freely and revert to previous versions.
- Extensive Module Library: Darktable offers a vast array of modules for everything from basic corrections to advanced color grading and detail enhancement.
- Color Management: Darktable supports full color management, ensuring accurate color representation throughout your workflow.
Whether you’re a professional photographer or a hobbyist, Darktable provides all the tools you need to create stunning images. This post is expanding on the RAW processing capabilities mentioned in the pillar post.
Setting Up Darktable for Optimal RAW Processing
To get the most out of Darktable, it’s essential to set it up correctly. This section will guide you through the initial configuration steps for optimal RAW processing.
Calibrating Your Monitor for Accurate Colors
Calibrating your monitor is crucial for ensuring accurate color representation in your images. Without a calibrated monitor, the colors you see on your screen may not be accurate, leading to incorrect adjustments and unsatisfactory results. For a more in-depth explanation, see our article on Monitor Calibration for Photographers. Relying on generic ICC profiles is not recommended, as they may not be suitable for your specific monitor. Instead, it is recommended to prioritize calibrating your own monitor.
To calibrate your monitor, you’ll need a calibration device, such as a colorimeter or spectrophotometer. These devices measure the colors displayed on your screen and create a custom ICC profile that corrects any inaccuracies. Once you’ve created a profile, load it into your operating system and Darktable for accurate color representation. If you have outdated ICC Profile Recommendations, create your own profiles. You may also want to check the monitor manufacturer’s website.
Configuring Hardware Acceleration (GPU)
Hardware acceleration utilizes your computer’s graphics card (GPU) to speed up image processing tasks in Darktable. This can significantly improve performance, especially when working with large RAW files.
To enable hardware acceleration in Darktable, go to Settings > Processing and enable the “opencl” option. Darktable will automatically detect your GPU and use it for processing. If you experience any issues, make sure your GPU drivers are up to date. For optimal performance, look for GPUs with good OpenCL support and sufficient VRAM (4GB+ for large RAW files). NVidia, AMD and Intel ARC integrated graphics cards will generally work.
Integrated GPUs can work well, but may be limited by shared system RAM. Reference benchmarks for hardware on sites like Phoronix. It is important to avoid relying on Outdated Hardware Acceleration Advice and instead focus on the latest trends.
Importing and Organizing Your RAW Photos
Importing your RAW photos into Darktable is the first step in your RAW processing workflow. To import photos, simply drag and drop them into the Darktable window or use the “Import” button.
A well-organized file structure is essential for managing your photo library. Create a system of folders and subfolders to categorize your photos by date, event, or project. Use descriptive filenames to make it easier to find specific images. Darktable Catalogs can help you to manage files, ratings, and metadata effectively.
Mastering the Darktable Workflow: A Step-by-Step Guide
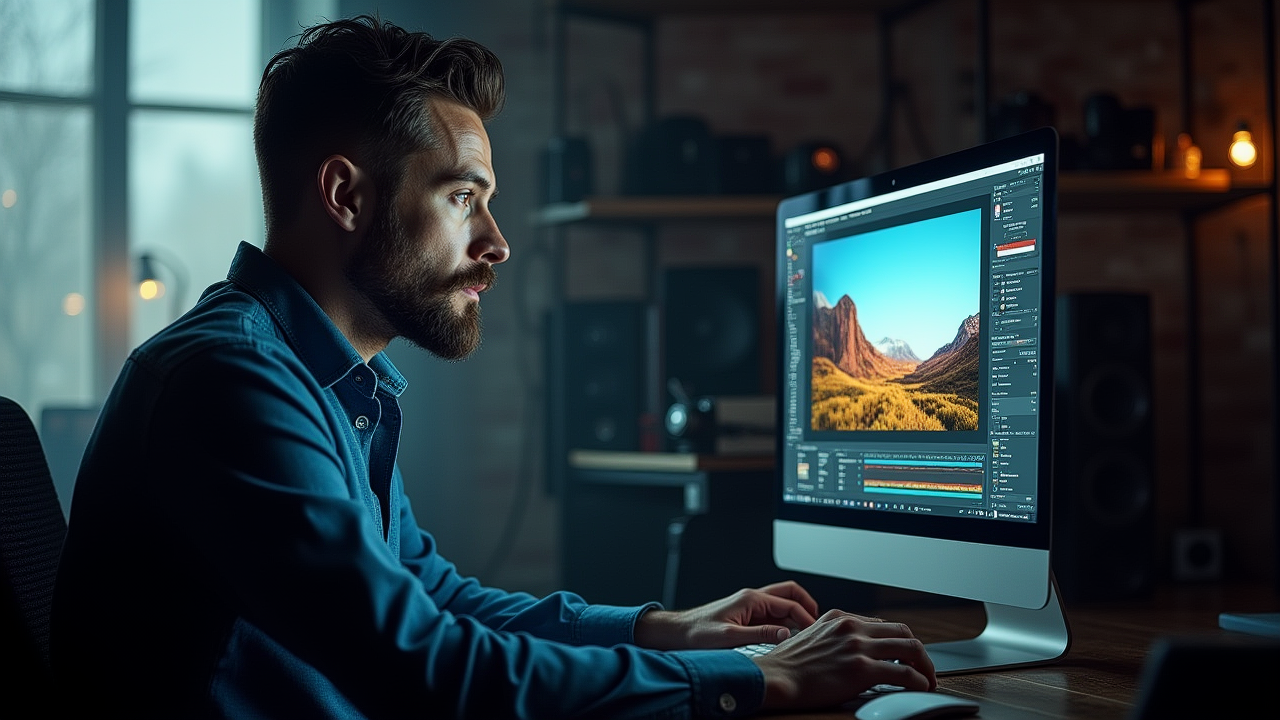
This section provides a detailed Darktable tutorial with a step-by-step guide to RAW processing in Darktable. We’ll use screenshots and before/after examples to illustrate each step.
Step 1: Basic Corrections (Exposure, White Balance)
The first step in your workflow should be to make basic corrections to the exposure and white balance of your image. Use the Exposure module to adjust the overall brightness of the image. Increase the exposure to brighten the image or decrease it to darken it. Use the Contrast slider to increase or decrease the contrast between the highlights and shadows. Adjust the Highlights and Shadows sliders to recover details in overexposed or underexposed areas.
Use the White Balance module to correct any color casts in your image. You can use the presets (e.g., Daylight, Cloudy, Tungsten) or make custom adjustments using the Color Temperature and Tint sliders.
Step 2: Tone Mapping with Filmic RGB (The Modern Approach)
Tone mapping is the process of adjusting the dynamic range of an image to fit the capabilities of a display device. In Darktable, the primary tool for tone mapping is Filmic RGB. As Outdated Tutorials (Darktable Version) will show, there was once Base Curve, but now there is Filmic RGB.
Filmic RGB offers several advantages over the older Base Curve module. It provides more natural-looking results, better highlight and shadow recovery, and greater control over contrast and dynamic range. Use the Filmic RGB module to control the overall look and feel of your image.
Step 3: Color Grading and Enhancement
Color grading is the process of adjusting the colors in your image to create a desired look and feel. Use the Color Balance RGB module to make precise adjustments to individual color channels. Adjust the Saturation slider to increase or decrease the intensity of the colors. Use the Vibrance slider to boost the saturation of muted colors without affecting already saturated colors.
Step 4: Detail Enhancement (Sharpening, Local Contrast)
Detail enhancement is the process of enhancing the sharpness and clarity of your image. Use the Sharpen module to sharpen the details in your image. Be careful not to over-sharpen, as this can create unwanted artifacts. Use the Local Contrast module to add depth and dimension to your image.
Step 5: Noise Reduction (Including AI-Powered Options)
Noise reduction is the process of removing unwanted noise from your image. Noise can be especially problematic in low-light situations or when shooting at high ISO settings.
Use the Denoise (profiled) module to remove noise without sacrificing detail. This module uses advanced algorithms to identify and remove noise while preserving the sharpness and clarity of your image. Noiseflow is an AI-powered noise reduction plugin for Darktable. AI-Powered Noise Reduction is rapidly improving, but it’s still in early stages.
Step 6: Exporting Your Final Image
Exporting your final image is the last step in your RAW processing workflow. Darktable offers a variety of export options, allowing you to choose the right settings for different output formats and purposes.
Use the Export module to export your image. Choose the desired file format (JPEG, TIFF, etc.), quality settings, and output size. You can also add metadata and watermarks to your exported image. Export files for printing, web or other purposes.
Deep Dive into Essential Darktable Modules
This section provides detailed explanations and examples of key Darktable modules, to expand on the Darktable workflow.
Filmic RGB: The Key to Modern Tone Mapping
Filmic RGB is the modern approach to tone mapping in Darktable. It simulates the response of film to light, providing more natural-looking results and better highlight and shadow recovery. As one of Darktable’s most essential Darktable modules, it is worth taking the time to explore this essential module.
Color Balance RGB: Precise Color Control
Color Balance RGB allows you to make precise adjustments to individual color channels in your image. Use this module to correct color casts, create custom color grades, and fine-tune the overall color balance of your image. You can use it for more precise Darktable color adjustments.
Tone Equalizer: Targeted Brightness Adjustments
The Tone Equalizer allows you to selectively adjust brightness in different tonal ranges. This is useful for brightening shadows, darkening highlights, and creating a balanced image. It is one of the most important Darktable modules.
Local Contrast: Enhancing Fine Details
Local Contrast enhances fine details and adds depth and dimension to your image. This module is useful for bringing out textures and creating a more visually appealing image. Darktable allows you to make these adjustments non-destructively.
Denoise (profiled): Removing Noise Effectively
Denoise (profiled) removes noise without sacrificing detail. This module is useful for cleaning up images shot at high ISO settings or in low-light conditions. It’s among the handiest Darktable modules.
Watermark Module: Protect and Brand Your Work
The Watermark module adds a logo or text to your images. This is useful for protecting your work and branding your images. This is an effective way of using Darktable.
Advanced Darktable Techniques
Now that you have a solid understanding of the basics of Darktable workflow, let’s explore some advanced techniques that can take your RAW processing skills to the next level.
HDR Image Creation in Darktable
HDR (High Dynamic Range) imaging is a technique used to capture a wider range of tones than is possible with a single exposure. Darktable offers several tools for creating HDR images, including the Exposure Fusion and Tone Mapping modules.
Panorama Stitching Workflow with Darktable
Darktable can be used as part of a panorama stitching workflow. While it doesn’t directly stitch images, you can process individual segments to prepare them for stitching in other software.
Advanced Masking Techniques
Masking allows you to selectively apply adjustments to specific areas of your image. Darktable offers a variety of masking tools, including drawn masks, parametric masks, and raster masks. Mastering masking techniques can greatly enhance your RAW processing skills.
Future Trends: AI and Cloud in Darktable (2025+)
The future of Darktable 2025 is likely to be shaped by advancements in artificial intelligence (AI) and cloud computing. Let’s explore some potential trends.
AI-Assisted RAW Processing (Plugins & Future Integrations)
AI-powered tools are already making their way into photo editing software, and Darktable is no exception. Plugins like Noiseflow demonstrate the potential of AI for tasks like noise reduction. In the future, we may see native AI integrations within Darktable for tasks like smart masking, content-aware fill, and automated image enhancement, contributing to AI photo editing Darktable.
Cloud-Based Darktable Workflows (Workarounds & Future Possibilities)
Currently, Darktable lacks native cloud integration. However, photographers are already using cloud storage services like Dropbox and Google Drive to store and sync their RAW files. Cloud Storage for RAW Files, and Darktable cloud storage, could become more integrated in the future. Future versions of Darktable may leverage cloud services more directly, allowing for seamless collaboration and access to your photo library from anywhere.
Darktable on Mobile Devices (Remote Access & Future Apps)
While there is no official Darktable mobile app, users are employing remote desktop apps to control Darktable from tablets. Remote Access for Darktable Control allows for remote culling and basic editing on the go. It is possible that official Darktable mobile companion apps with a streamlined interface for specific tasks will be developed in the future.
Troubleshooting Common Darktable Issues
Even with a solid understanding of Darktable, you may encounter some common issues. This section provides solutions to help you troubleshoot these problems. This Darktable tutorial should set you on the right track.
Fixing Color Casts
A color cast is an unwanted tint of color in your image. To fix color casts in Darktable, use the Color Balance RGB module to make precise color adjustments.
Reducing Noise
Noise can be a common problem, especially in low-light situations. To reduce noise in Darktable, use the Denoise (profiled) module.
Improving Sharpness
If your image looks soft or blurry, you can use the Sharpen module to improve sharpness.
Darktable Community & Resources
Here are some resources to get started with Darktable:
- Darktable official documentation
- Online forums and communities (e.g., pixls.us)
- Tutorial websites and YouTube channels
Darktable Alternatives
While Darktable is a powerful RAW photo editor, there are other alternatives available, both free and paid. Here are a few options:
- RawTherapee
- Capture One
- Adobe Lightroom
Conclusion: Embracing Darktable for Professional RAW Photo Editing
Darktable stands as a testament to the power of open-source software, offering a robust and feature-rich platform for RAW photo editing. As a free Lightroom alternative, it provides photographers of all levels with the tools they need to unlock the full potential of their images. Its non-destructive editing capabilities, extensive module library, and commitment to color management make it a compelling choice for those seeking a professional-grade editing experience without the subscription fees. It is time to embrace the growing interest in open-source software!
While Darktable’s learning curve may seem daunting at first, the rewards are well worth the effort. By mastering its workflow and exploring its advanced features, you can achieve stunning results and elevate your photography to new heights. So, dive in, experiment, and unleash your creativity with Darktable.
For Further Reading
To broaden your understanding of photography and photo editing, explore these resources:
- Delve into the concept of an Open-Source Photography Workflow for a fully customizable and cost-effective solution.
- Learn about the importance of Monitor Calibration for Photographers to ensure accurate colors in your images.
- Discover the latest trends in AI-Powered Photo Editing Tools and their potential impact on the future of photography.
“`